PANEL LINE WASHES
|
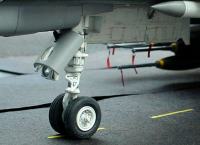
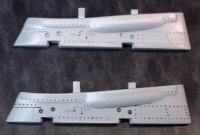
A "Wash" is a means for emphasizing subtle areas on a model or for adding areas of weathering. For example, the dirt that collects in areas of an aircraft or tank can be done using a wash. There are better techniques for areas of heavy mud or built-up dirt, but to just show the coloration of dirt a wash is perfect. A wash can also be used to emphasize the shadows that are common in corners where two panels come together, for example in an airplane cockpit, or between panels on an airplane's skin. As with muddy areas there are other techniques such as "Pre Shading" that work quite well but a wash is an easy way to enhance otherwise bland areas on a model.
I would like to point out that I primarily build airplane models. I don't pretend
to know anything about armor and wouldn't know where to start to accomplish some of the
beautifully shaded and weathered tanks I've seen, so this article is mainly about aircraft.
If the techniques translate to armor and other venues that is great, but I don't
know how well they will work.
I'd also like to point out that as with many other aspects of modeling there is no "Best"
way to do anything. The "Best" way for you is the way that you prefer, and only
experimentation on your part will allow you to find that. Try different things.
Find out what works best for you. What works for me may not work for you, and
what is written here is only that which works best for me.
A couple of words of advice:
Washing panel lines, especially on large models, can be quite time-consuming. On
large models there are a lot of panel lines and each one needs to be done individually. Before
you start you need to decide whether you are going to invest the time necessary to do it right
because a sloppy wash looks worse than no wash at all in my opinion. You need to
take the time that is necessary to get the excess off completely or the model will just
look dirty and sloppy. If you aren't going to do your wash right just don't do it
at all.
Before you add your final clear coat, take the time to stop and look over every single
line under different lighting angles. It is normal to miss getting the excess off
in a few places, and it is far easier to find that and clean it up before you spray your
model with a clear gloss or flat coat than it is to find it later.
There are various methods for doing a wash. Many people use enamel or oil-based
paint for their washes. Others, myself included, use acrylic or water color for
a wash. The type of thinner that is used to get the excess wash off is based on
the type of paint used and the preference of the person doing the wash. It is
important that you find a method that works best for you. Everyone uses the method
that they prefer and that may or may not be the best for you. Experiment. Find
a method that works for you, and if it is different from everyone else's, so what. All
that matters is that it works for you.
I'm not going to go into a lot of detail on how to weather a model. Rather
I will refer you to Matt Swan's
page on weathering since he goes into a lot of detail. This page describes
the method that I use for a wash, and your ideas or methods may vary.
The first thing I do is prepare the surface. I never, never, EVER try to apply
a wash to a flat surface. The surface doesn't have to be perfectly smooth and
glossy, but the smoother it is the better the wash will flow. I've heard of some
people getting away with doing a wash on a flat surface, but my experience is that it
is a perfect recipe for a disaster. The wash is so thin that it runs through the
texture of the flat surface and no amount of rubbing is going to get it off. I
ALWAYS put a coat of Future on top of flat paint prior to adding a wash. Future
Floor Polish is the modeler's duct tape and it works for just about any circumstance
when you need a glossy surface. If you aren't familiar with how to use it I'll
refer you once again to Matt Swan's web site, but this time to his page on
The Complete
Future. Where would we be without Swanny's help!
The next step is to pick the appropriate color. To emphasize shadows and
panel lines the color chosen should be a few shades darker than the base color.
If the base color is green then the wash should be a slightly darker green. If
the base color is gray then the wash color should be a darker shade of gray. If
I am specifically trying to show dirt or grime then the color chosen can be a very
dark gray or brown. Many people use dark sepia as their "Normal" wash color.
If this works for you that's great. Again, my advice is to experiment and find
what works for you.
Next, mix up the wash. I nearly always use artist's acrylics for a wash because
they work well, dry very quickly, and the excesss comes off easily. I mix a
couple of drops of paint with a lot of water. Don't ask me what thinning ratio
I use because I have no earthly idea. Maybe somewhere around 20 or 30 to 1,
but I never bothered measuring it. I just get it slightly darker than you want
the final color to be. I then add a couple of drops of dishwashing detergent and
a couple of drops of white vinegar to the mix. The detergent decreases the surface
tension of the water and allows it to flow along the panel lines better. The vinegar
helps keep it in the areas you are washing. You can also use Liquitex Flow-Aid (thanks
Matt!) in place of the detergent and vinegar, it works quite well.
Dip the brush in the wash and touch it to a panel line. Capillary action will
pull the wash right along the panel line. Don't worry about excess getting outside
the line, that's the next step. If the wash doesn't flow properly you may need
to add a little bit more dish washing detergent (acrylic and water color washes ONLY!)
or get your surface a little smoother.
Once the wash has dried (only a couple of minutes are necessary for acrylic or water
color washes) I wipe the excess off. I use a Q-Tip rolled tightly and then
moistened (NOT soaked or wetted or dunked, just barely moistened) in Windex.
DO NOT rub hard and DO NOT rub very long. If the surface is smooth all you need
to do is wipe the Q-Tip over the wash and it will remove it. If you rub very long
or very hard it will remove the Future underneath. Also, try to rub across panel
lines and never along them. If you rub along the panel line you will remove all
of the wash, but if you rub across it this will not happen as badly.
Finally, I let everything dry and then spray a coat of clear gloss or flat over the top
and it's done. A word of warning here; you need to match the clear coat to the
type of paint used. Not just the wash, but your barrier coat and the base paint
underneath. Many of the clear coats that are in spray cans are laquer and if you
are using laquer over acrylic or water color you need to be especially careful since it
can easily dissolve the other paint. Spray a couple of very light mist coats and
allow ample curing time in between.
Date of last revision: September 21, 2005 | ||||||


